So, with this excess cheesecakey frosting beckoning me from deep inside the refrigerator, I began to think about what else I could use it on. Cupcakes, check. Hot cross buns, check. Ahhh... cinnamon rolls!
For the last four years of being gluten-free, I rarely get a complaint from my kids. (Well, about food anyway). However, my 9 year old has become virtually obsessed with gluten free cinnamon rolls. Maybe it's the alluring smell as you walk through the mall. Maybe it's her faint memory of canned cinnamon rolls popping open in the kitchen. But, apparently they've made an impact on this little girl and I have been trying to get the recipe right for years. Too dry. Not gooey. Too sweet. I've seen it all. We even spent $7.49 for four Udi's Gluten Free cinnamon rolls on her birthday. (Sorry, Udi's, this one was a disappointment. More like a cinnamon muffin.)
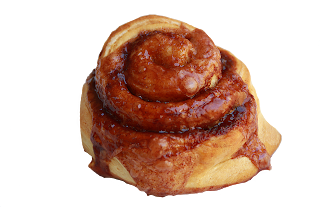
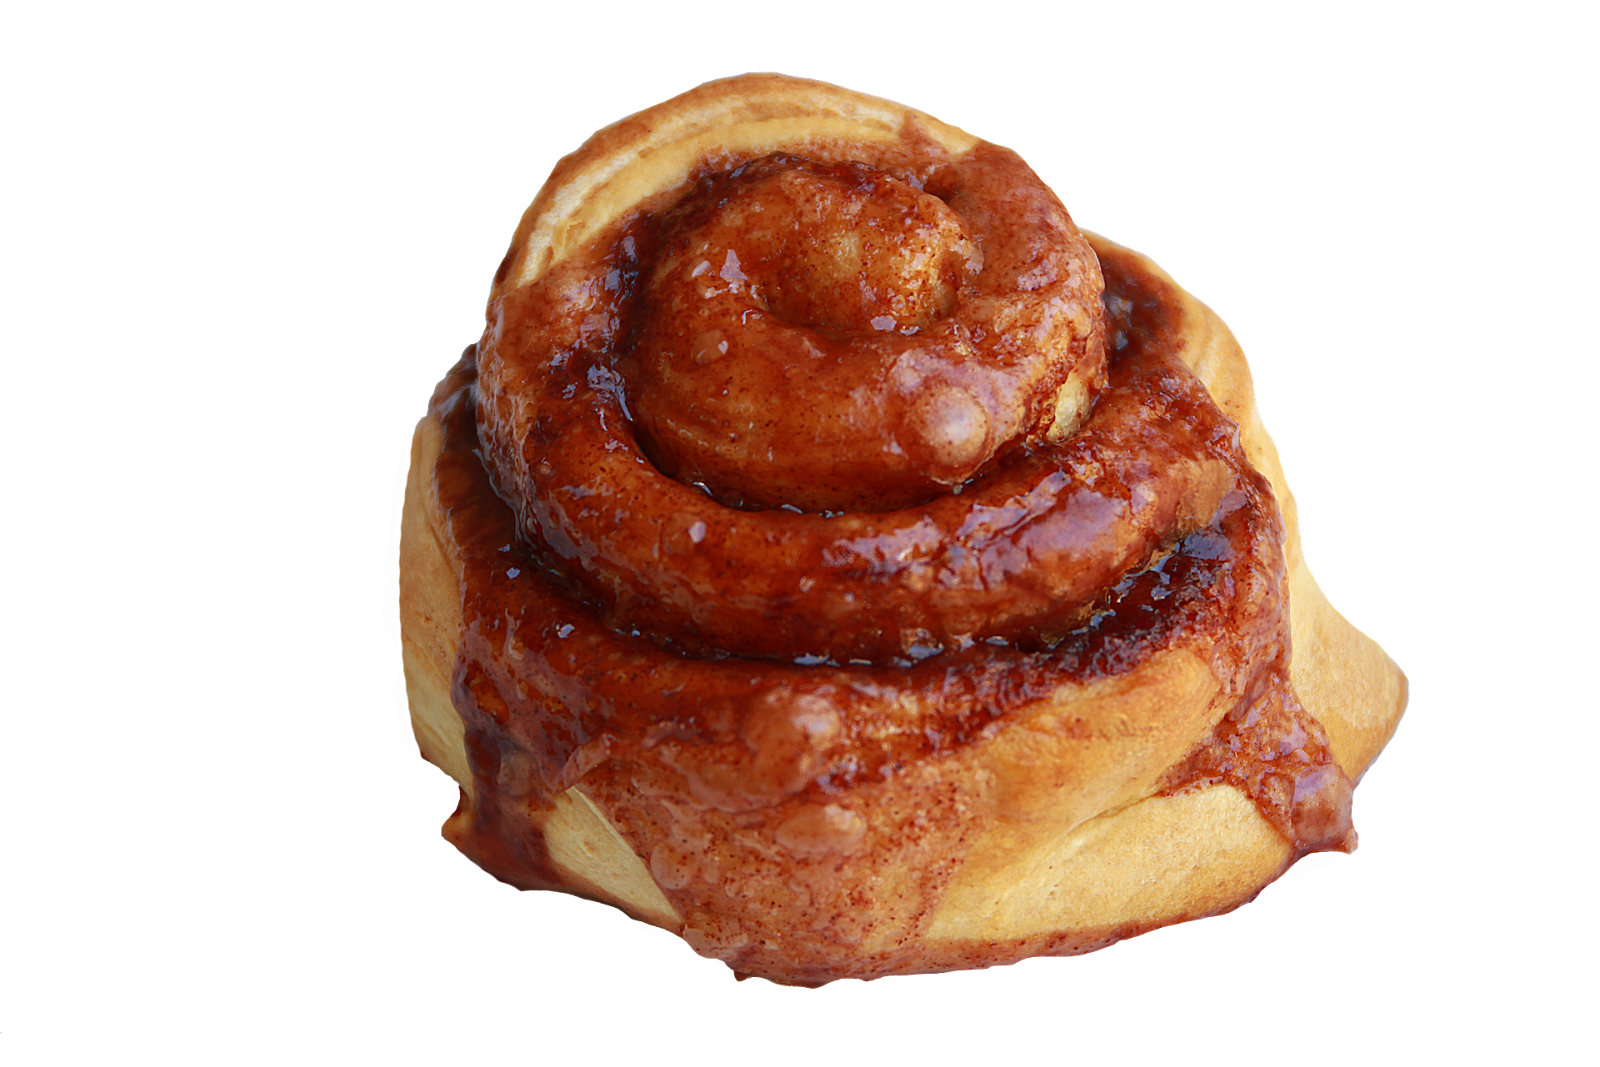
I think I can safely say that this recipe was a success. The husband declared it, "better than gluten cinnamon rolls! No one would know!" *insert applause*
I'm still not an expert at the whole cutting thing. And they are sticky - oh are they sticky - so count on some extra time to work slowly when they're raw. But, the end result is absolutely, positively worth it.
Dough:
3 Cups Pamela's Gluten Free Bread Flour (or gluten free flour blend of your choice)
3 eggs
1 Cup buttermilk, warmed to 105-115°F
1 packet dry yeast
1 TBSP sugar
1 packet unflavored gelatin (or vegetarian equivalent) dissolved in 1/4 cup of cold water
1 1/2 tsp apple cider vinegar
Filling
Combine gelatin and 1/4 cup water, set aside.
Mix warmed buttermilk, a tablespoon of sugar, and the yeast. Stir and set aside until foamy.
In a stand mixer, combine flour, eggs, gelatin mixture, and the yeast. Add the apple cider vinegar and mix until the dough comes together. Now let the machine run for about two minutes. It won't make it tough, since the dough does not contain gluten. While this is "kneading" mix together the filling (cinnamon, sugar, butter) and set aside.
Prep your surface. For gluten-free baking, I always use a silpat, even for rolling out dough. Sprinkle the surface with a thin layer of gluten free flour, then dust your rolling pin well. Scrap the dough out into a blob right in the middle of your silpat. (Could you use parchment? Maybe. I would say freezer paper would work better - which is what you see in that image above). But DO NOT heat freezer paper - EVER. It's wax and it will smoke up your kitchen. (Don't ask)
Okay, dough blob in the middle of a floured silpat? Got it. Now dust that with flour. (Not too much but enough that your rolling pin won't stick to it. It is EXTREMELY sticky!)
Slowly, gently, work on rolling it out. You might want to stretch it to the length of your silpat first. Then work on the width. Add another sprinkling of flour if you need to. (Did I mention it was sticky?)
Now that you have it close to a rectangle, you can trim off the edges that hang over. I made a mess, I'll admit. But the kitchen shears gave me a perfect rectangle (you can always save those little bits and pieces to make another odd roll later).
Spread the butter/cinnamon mixture around the entire surface. This isn't an exact science and I had some clumpy spots, but it all melts into a gooey sauce anyway. So, just do your best.
Now, working from the furthest side, carefully peel back the dough from the silpat about an inch. Fold it onto itself, rolling toward you. Once it has one section completely away from the silpat, you can lift the silpat and lift it slightly, easing the dough off its surface. You shouldn't have to touch the dough a lot - it will pull off the silpat pretty easily. (You can nudge it once in a while if you get a sticky spot).
If you've made a sponge cake or Bûche de Noël you've seen this process.
Once you have rolled it all in a log, pinch the loose edge so that it seals a bit, then get out some dental floss. I like cinnamon but plain is just fine, too. Cut about an 18" piece. These are your scissors.

image from BHG.com
See how she is nestling the floss about an inch and a half from the edge, then wrapping it around? Continue to pull in a swift motion and voila! A perfectly cut cinnamon roll.
Now, in a 9X13, lay your cinnamon rolls swirly side up. Cover with saran wrap and let rise until doubled. Humidity and room temperature play a big role in this, so I'm going to say 3-5 hours.
Preheat oven to 375° once the rolls have risen and filled in the space between. Bake for 28-32 minutes (just check them once in a while in case your oven runs different from mine).
(Cook's Note: Adding a small casserole filled halfway with hot water to the oven will help add moisture and a soft, chewy texture. I place this on the bottom rack, then the pan of cinnamon rolls on the top rack near the middle of the oven).
To serve, I cut a large piece of freezer paper and laid it out on my counter shiny side up. Invert the cinnamon rolls right away, so that the butter and brown sugar pours back over the top and soaks in. While still warm, drizzle with cream cheese frosting.
Try to have leftovers... I dare you!